

You’re sitting on the kitchen floor. Your dog is giving you those big, trusting eyes. You’ve got the clippers in your hand and then you look down at those pitch-black nails and completely freeze.
Trimming black dog nails is one of the most common challenges American dog owners face. Unlike light-colored nails where you can see the pink quick right through the nail, black nails give you absolutely nothing to work with. No visual guide. No obvious stopping point. Just a solid wall of darkness and your own nervous heartbeat.
But here’s the good news: you don’t need to guess. There’s a reliable technique that groomers and experienced pet owners use every single time. Once you learn it, you’ll never feel paralyzed by those clippers again.
This guide will walk you through everything from understanding black nail anatomy to trimming overgrown nails safely in plain, friendly English. No jargon. No fluff. Just real, actionable steps that work.
Why Black Dog Nails Are Trickier (And What That Means for You)
White or clear nails? Easy. You can literally see the pink quick inside and stop well before it.
Black nails? Completely different story.
The dark pigment in black nails makes it impossible to see the quick from the outside. That’s not a personal failure — it’s just biology. And because of that, cutting black dog nails requires a different approach altogether.
According to the American Kennel Club, regular nail trimming is one of the most overlooked aspects of dog care in the United States. Overgrown nails can affect a dog’s posture, cause joint discomfort, and even change the way they walk over time.
So yes, this matters. And yes, you can absolutely learn to do it right at home.
Understanding Black Dog Nail Anatomy Before You Cut Anything
Before you pick up those clippers, you need to understand what you’re working with.
What is the Quick and Why Does It Matter?
Every dog nail has two main parts. The outer shell is made of keratin — the same protein that makes up your own fingernails. It’s hard, dead material. Totally safe to cut.
Then there’s the quick. That’s the living inner tissue. It contains blood vessels and nerve endings, which is exactly why nicking it causes a brief sharp pain and bleeding.
On white nails, the quick shows up as a pink shadow inside the nail. On black nails, you simply can’t see it from the outside. That’s why the technique matters so much here.
The good news? The quick doesn’t run all the way to the tip of the nail. It starts closer to the base and the tip of the nail is mostly dead keratin — which is your safe cutting zone.
Where is the Quick on Black Dog Nails?
This is the question every beginner asks. Here’s the honest answer: you can’t see it from the outside. But you can find it as you cut, using what groomers call the cross-section method.
Here’s exactly how it works:
As you trim thin slices off the tip of the nail and look at the freshly cut surface, the center of the nail will change color as you get closer to the quick.
- White or chalky center: You’re in the safe zone. Keep going carefully.
- Gray or slightly glossy center: You’re getting very close. One tiny slice at most.
- Small dark dot appears in the center: Stop immediately. That’s the quick.
This is the method. This is your roadmap. Every slice tells you exactly where you are.
According to VCA Animal Hospitals, understanding the internal structure of the nail before trimming dramatically reduces the risk of injury during at-home grooming.
Expert Tip: Get a small flashlight and shine it directly through the nail from above at an angle. On some dogs with slightly less dense black nails, you can actually see a faint shadow of the quick. It doesn’t always work, but when it does, it’s a total game-changer.
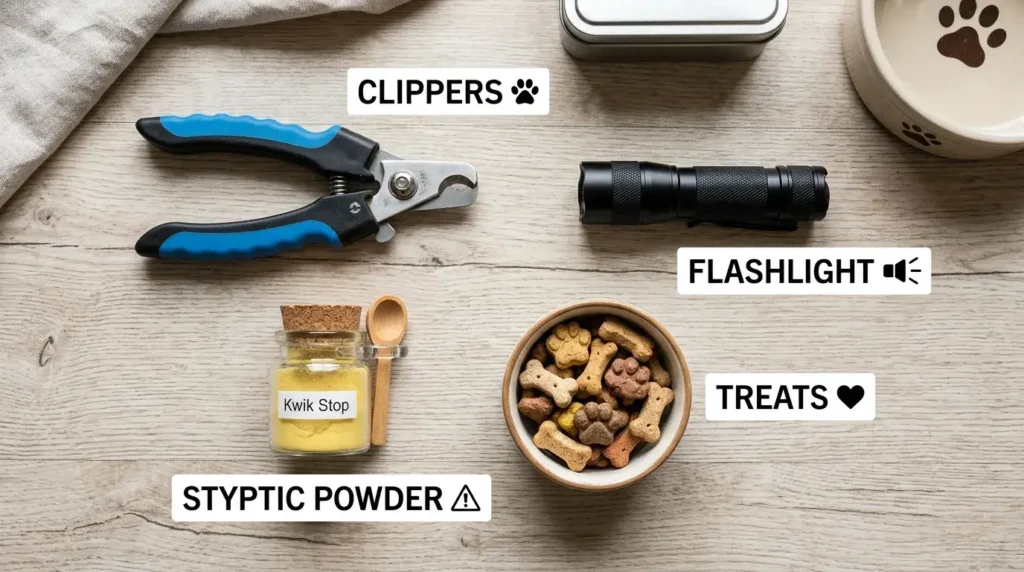
What You’ll Need Before You Start Trimming
Great grooming starts with great preparation. Walking in without the right tools is like trying to make a recipe without checking your pantry first.
Choosing the Right Nail Clippers for Black Dog Nails
There are two main types of dog nail clippers on the market:
| Clipper Type | Best For | Notes |
|---|---|---|
| Guillotine-Style | Small to medium dogs | Requires precise positioning |
| Plier/Scissor-Style | Medium to large dogs | More control, works well on thick black nails |
| Nail Grinder | Any size, nervous dogs | Gradual removal, great for beginners |
For black nails specifically, most groomers recommend plier-style clippers or a nail grinder. The plier style gives you better control over the angle of the cut. The grinder removes tiny amounts at a time, which is ideal when you’re still learning to read the cross-section.
One thing most beginner guides skip: sharpness matters a lot. Dull clippers don’t cut cleanly — they crush and compress the nail, which is uncomfortable for your dog even when you don’t hit the quick. If your clippers are more than a year old and used regularly, it’s probably time for a new pair.
Other Supplies to Have Ready
- Styptic powder or cornstarch — for quick-nicks (it stops bleeding fast)
- A bright flashlight or headlamp — essential for reading the cross-section
- High-value treats — think small, soft, and something they go absolutely wild for
- A non-slip mat — keeps your dog stable and calm on hard floors
- A second person — optional but incredibly helpful for wiggly or anxious dogs
Getting Your Dog Comfortable Before the First Clip
If your dog already tenses up when you touch their paws, don’t skip this part.
Spend a few days just handling your dog’s paws during calm moments — while they’re relaxed on the couch, during cuddle time, before bed. Let them sniff the clippers. Touch the clippers to their nails without cutting anything.
This is called desensitization, and it genuinely works. According to the American Veterinary Society of Animal Behavior, positive early exposure to grooming tools significantly reduces stress-related behavior during home care routines.
If your dog is especially nervous, try the “one nail a day” method. Clip one nail, give a big treat, and stop. Do that for 18 days to do all nails twice over. It feels slow, but the trust you build is worth every extra day.
You might also want to brush up on your dog’s body language before you start. Knowing when your dog is stressed versus just mildly uncomfortable helps you make better decisions mid-trim.
How to Trim Black Dog Nails Step by Step
Alright. This is the part you came for. Let’s walk through it together.
Step 1: Set Up a Calm, Well-Lit Space
Find a spot with good natural light or a bright lamp. Sit on the floor for larger dogs. Use a table or your lap for smaller breeds.
Take two or three minutes to just pet your dog calmly before you bring out the clippers. Let them settle. Your calm energy matters more than you think — dogs are incredibly good at reading ours.
For more ideas on building calming routines around grooming, check out this guide on daily dog care routines that work for busy American pet owners.
Step 2: Hold the Paw Firmly but Gently
Press the pad lightly to extend the nail forward naturally. Don’t squeeze the toes — just enough to get a clear view of the nail.
For dogs that pull their paw away, try cradling the leg from underneath rather than gripping from the top. It feels less restraining to them.
Step 3: Start at the Very Tip
Always start at the tip. Always.
Look at the nail from the side. The tip curves downward — that curved, pointy part is almost entirely dead keratin. That’s your safe starting zone.
Position your clippers at a slight angle (roughly 45 degrees) to match the natural curve of the nail.
Step 4: Make Small, Incremental Cuts and Read the Cross-Section
This is the golden rule of trimming black dog nails: small slices, not one big cut.
After every single slice, pause and look at the freshly cut surface of the nail in good light.
- White/chalky center: safe, continue
- Gray or slightly glossy center: getting close, maybe one more tiny slice
- Dark dot in the center: stop, you’re right at the quick
Most beginner mistakes happen because someone takes one or two large cuts instead of six or seven small ones. The thin-slice method removes that guesswork entirely.
Step 5: Reward After Every Single Nail
Not after all the nails. After each one.
Hand over that treat the moment you finish each nail. Make it a celebration. Over time, your dog starts to associate the clippers with good things, and the whole process gets easier with every session.
Step 6: Smooth Any Sharp Edges
Once all nails are done, run a nail file or grinder briefly over any sharp corners. This prevents snagging on carpet or skin and gives the nail a cleaner finish.
Many dogs who hate the sound of clippers actually tolerate the grinder much better at this stage. Worth trying.
How to Trim Overgrown Black Dog Nails Safely
Overgrown nails need a different strategy. Here’s why.
When nails grow long, the quick grows along with them. So you have less margin between the tip and the quick than you would on regularly trimmed nails. Trying to trim overgrown nails back to the ideal length in one session is a recipe for a quick-nick and a traumatized dog.
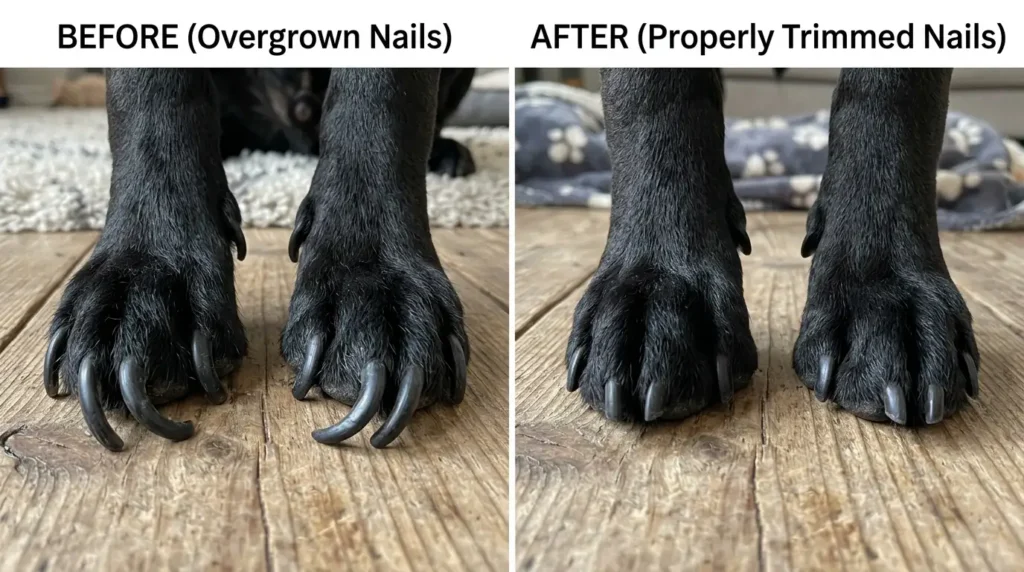
The right approach is gradual. Trim a little every one to two weeks. The quick will naturally recede backward over time — usually about a millimeter or two with each trim — until the nails reach a healthy length.
Signs your dog’s nails are overgrown:
- You can hear them clicking on hard floors when they walk
- The nails visibly extend past the paw pad when your dog stands
- The nails are starting to curve sideways
According to PetMD, dogs whose nails touch the ground when standing are already overdue for a trim.
Don’t Forget the Dewclaw
The dewclaw is that extra nail on the inner side of the leg, a bit above the paw. Many owners forget it entirely because it never touches the ground.
That’s exactly the problem. Because it never wears down naturally, it grows fast. And if it gets long enough, it can curl around and grow into the skin, which is genuinely uncomfortable for your dog.
Use the same thin-slice cross-section technique on the dewclaw. Just be extra careful — these nails are often thinner and the quick can be closer to the surface.
Common Mistakes Beginners Make When Cutting Black Dog Nails
Let’s be real — everyone messes up at least once. Here’s how to not be that person.
| Mistake | Why It’s a Problem | Easy Fix |
|---|---|---|
| Cutting too much at once | Most common cause of quick-nicks | Use the thin-slice method, always |
| Using dull clippers | Crushes the nail, causes pain without hitting the quick | Replace clippers annually |
| Skipping treat rewards | Destroys positive association fast | Treat after every single nail |
| Trimming in poor lighting | Can’t read the cross-section signal | Use a headlamp or bright lamp |
| Quitting after one bad experience | Creates lasting nail-trimming anxiety | One bad session doesn’t define the routine |
| Forgetting the dewclaw | Can grow into the skin over time | Always check all four legs |
| Trying to do all nails on a stressed dog | Makes anxiety worse over time | Short sessions are smarter sessions |
Pro Tips From Groomers: Making Black Nail Trimming Easier Every Time
These aren’t things you’ll find on most beginner guides. These are the little tricks that actually make a difference.
The lick mat trick. Spread a thin layer of peanut butter (xylitol-free) or wet dog food on a lick mat and stick it to a wall at nose height. Your dog will be so focused on licking that they barely register what you’re doing. Professional groomers use this constantly.
Trim right after a bath. Nails are slightly softer after being in water, which makes them easier to cut cleanly and reduces that unpleasant crushing feeling from clipper pressure.
The scratch board method. Teach your dog to paw at a piece of sandpaper laid flat or mounted at an angle. Dogs naturally scratch at it, which gradually files the front nails between grooming sessions. It’s surprisingly effective.
Build a weekly 30-second check. Even if you only clip one nail, a quick weekly paw inspection keeps your dog desensitized and keeps nails from getting out of hand.
Keep styptic powder within arm’s reach every time. Not because you’re definitely going to need it. But because knowing it’s right there reduces your anxiety. And your dog? They absolutely pick up on your nervous energy. A calm owner makes for a calmer dog.
If you have a particularly anxious or high-energy breed, it might also be worth reading up on the calmest dog breeds and how temperament affects grooming tolerance. And if nail trimming has become a real battle in your house, a professional dog trainer can help you build better behavior routines around handling.
You’ve Got This — One Nail at a Time
Here’s the honest truth: trimming black dog nails feels impossible right up until the moment it doesn’t.
The thin-slice cross-section method takes the guesswork completely out of the equation. Good lighting, sharp clippers, high-value treats, and a little patience — that’s genuinely all it takes.
Three things to take away from this guide:
- The dark dot in the cross-section is your stop signal. Trust it every time.
- Prepare your space, your tools, and your dog before the first clip. Setup matters.
- Reward every single nail. Consistency builds trust, and trust makes every session easier.
Every professional groomer once sat exactly where you are right now — clippers in hand, a little nervous, hoping for the best. The only real difference between then and now? They kept going.
So will you.
Frequently Asked Questions about Trimming Black Dog Nails
How do I know where the quick is on black dog nails?
You can’t see it from the outside, but you can find it as you trim. Use the thin-slice method: cut small increments off the tip and examine the center of the cut surface after each slice. A white or chalky center means you’re safe. A gray center means you’re close. A small dark dot in the center means stop — that’s the quick. Good lighting is essential for reading these signals accurately.
How short should I cut my dog’s black nails?
The goal is to trim until the nail no longer touches the floor when your dog stands on a hard surface. Don’t try to measure length — use the cross-section color signal as your real guide. When you see the gray center, you’re close enough. Stop there, and you’ll be in the safe zone every time.
What should I do if I cut the quick on a black nail?
Stay calm first — your dog will react to your anxiety. Apply styptic powder or plain cornstarch directly to the nail tip and hold gentle pressure for 30 to 60 seconds. Bleeding typically stops quickly. Give your dog a big treat and plenty of reassurance. This is not a vet emergency unless the bleeding continues beyond 10 to 15 minutes or the dog shows signs of significant distress.
How often should I trim my dog’s black nails?
Most dogs need a trim every three to four weeks. If nails are overgrown, trim every one to two weeks to gradually push the quick back. Very active dogs who spend time on pavement naturally wear their nails down faster and may need less frequent trimming. A good rule of thumb: if you can hear them clicking on the floor, it’s time.
Is a nail grinder better than clippers for black dog nails?
Both work well, and the best choice depends on your dog’s tolerance. Grinders remove material very gradually, which gives you more control and is ideal for beginners still learning the cross-section method. Clippers are faster once you’re confident. Some dogs strongly prefer one over the other — the grinder’s vibration bothers some dogs while others find the sharp click of clippers more startling. Try both and let your dog tell you.
Can I trim my black-nailed dog’s nails at home, or should I go to a groomer?
Absolutely, you can do this at home. That’s exactly what this guide is for. Professional groomers are a great option if your dog is severely anxious, if nails are extremely overgrown, or if you just want someone to show you the technique in person the first time. But regular home trimming is completely achievable, saves money over time, and actually helps build your dog’s comfort with paw handling. Start slow, stay consistent, and you’ll get there.


