
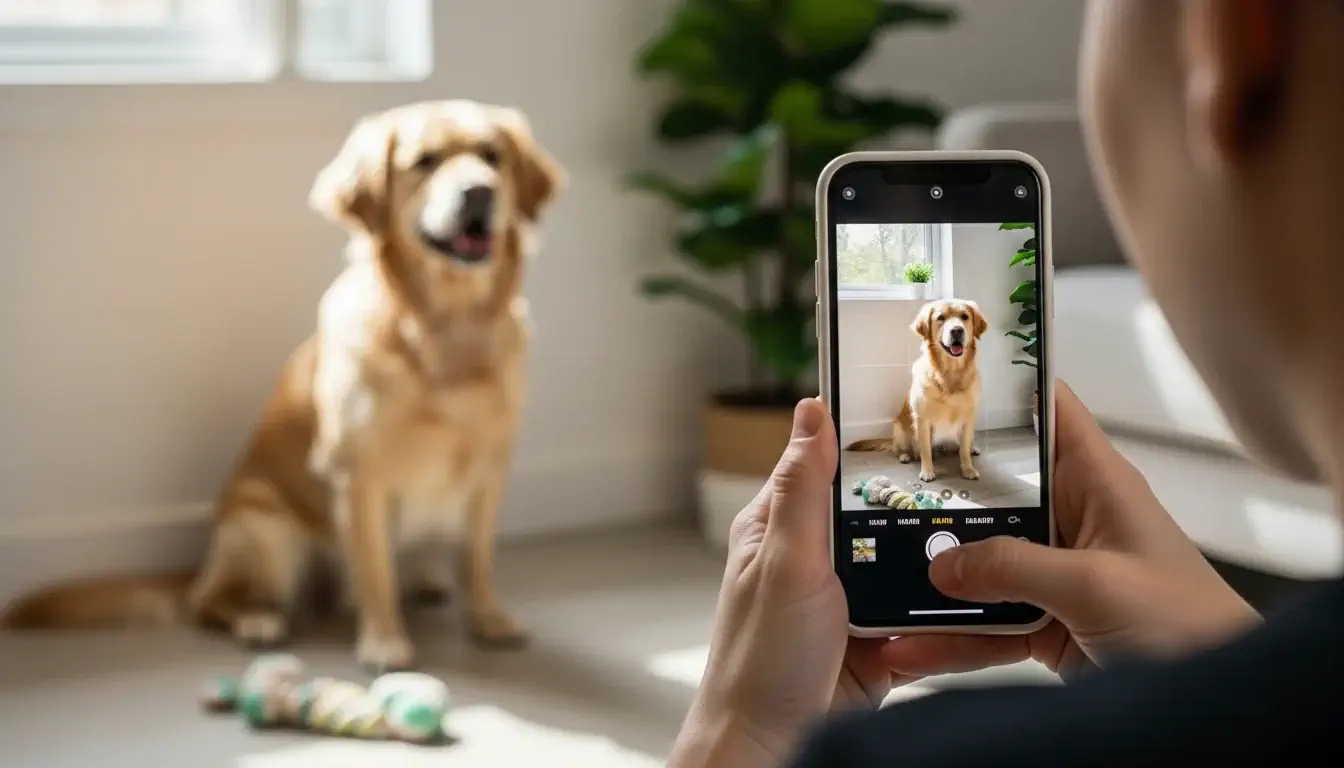
You know that feeling when your dog does something absolutely adorable, you grab your iPhone, and by the time you tap the screen… you’ve got a blurry, tongue-flapping disaster of a photo?
Yeah. We’ve all been there.
Maybe Bella was mid-zoomie. Maybe Cooper was this close to holding that perfect sit. Either way, your camera roll is basically a highlight reel of missed moments and closed eyes.
Here’s the good news: you don’t need a $3,000 camera or a photography degree to take stunning dog photos. Your iPhone is genuinely powerful enough to do the job, and most people just aren’t using it right.
Modern iPhones pack features like Portrait Mode, Smart HDR, and AI-enhanced autofocus that were literally built for fast-moving subjects like your goofy pup.
In this guide, you’ll learn everything from lighting tricks and camera settings to getting your dog to actually look at the camera (the holy grail, honestly). Whether you’re shooting indoors on a lazy Sunday or out at the park chasing your dog in circles, these tips will level up your pet photography game fast.
Let’s get into it.
Why Your iPhone is Perfect for Dog Photography
Do you really need expensive gear to take great dog photos?
Nope. Not even close.
Here’s the thing, professional photographers will tell you the best camera is the one you already have. And for most of us, that’s the iPhone sitting in our pocket right now.
iPhones are made for moments like these. They’re fast, lightweight, and always within reach. No fumbling with a camera bag while your dog is mid-leap into a pile of autumn leaves.
The newer iPhone models (think iPhone 13 and beyond) come loaded with features that genuinely rival entry-level DSLRs:
- Portrait Mode blurs the background beautifully, making your dog the undeniable star
- Smart HDR balances light and shadow automatically, so fur details don’t get washed out
- AI-powered autofocus tracks movement surprisingly well, even with a hyper Labrador involved
- Burst Mode lets you fire off multiple shots per second, perfect for action-heavy pups
According to Apple, the iPhone 15 Pro shoots in ProRAW format, giving you more editing flexibility than most point-and-shoot cameras ever could.
You don’t need expensive gear. You just need the right techniques. And that’s exactly what we’re covering next.
Step-by-Step Guide: How to Take Professional Dog Photos with iPhone
So, where do you actually start?
Right here. Follow these steps and you’ll go from blurry chaos to frame-worthy shots faster than your dog can steal a sock.
1. How Do You Prepare Your Dog for a Photo Session?
Tire them out first. Seriously, this is the secret nobody talks about.
A dog running on full energy will not sit still for photos. Take them for a walk, play a quick game of fetch, or let them burn some zoomies in the backyard before you even open your camera app.
Once they’re a little calmer, grab their favorite treats and a toy or two. Treats work as both a reward and an attention magnet. Hold one near your lens and watch those ears perk up instantly.
Keep the session short, 10 to 15 minutes max. Dogs lose interest fast, and a bored dog means uncooperative photos. End on a positive note so they actually enjoy the next session too.
2. Where Should You Photograph Your Dog?
Location matters more than most people realize.
Outdoors is usually a winner. A backyard, a local park, or even your front porch gives you natural light and a relaxed environment your dog already feels comfortable in. When we visited dog parks in Austin, we noticed dogs photographed in familiar spaces looked noticeably more relaxed and expressive compared to staged indoor setups.
If you’re shooting indoors, keep the background clean and simple. A plain wall, a tidy couch, or a wooden floor works beautifully. Avoid cluttered rooms with laundry piles or busy wallpaper fighting for attention in the frame.
The golden rule? Your dog should be the only thing the viewer’s eye goes to.
For more tips on creating a stress-free environment for your pup, check out our guide on choosing the right dog trainer to build that calm, cooperative energy before shoots.
3. Why Should You Get Down to Your Dog’s Eye Level?
Because it changes everything.
Most people photograph their dogs from a standing position, looking straight down. The result? A photo that feels distant and disconnected, kind of like a surveillance camera shot of your dog.
Getting down on your knees, or even your belly, puts you at their world. Suddenly the photo has depth, emotion, and intimacy. You see what they see. Viewers feel like they’re right there with your pup.
It feels a little silly lying on the grass at a public park, sure. Do it anyway. The photos are worth every weird look.
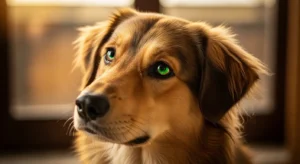
4. How Do You Focus on Your Dog’s Eyes?
Tap the screen directly on your dog’s eye.
On iPhone, tapping the screen locks focus on that exact spot. Eyes are the soul of any portrait, human or dog. A sharp, bright eye draws the viewer in immediately and makes even a simple photo feel professional.
If your dog is moving, tap-to-focus right before the shot. You’ll also see a small sun icon appear next to the focus box. Slide it up or down to manually adjust exposure so the eyes aren’t too dark or blown out.
Bright, in-focus eyes = a photo worth printing and hanging on your wall.
5. How Do You Capture Sharp Photos of Moving Dogs?
Burst Mode is your best friend here.
Press and hold the shutter button on your iPhone and it fires off a rapid series of shots. Instead of praying you timed it perfectly, you get 15 to 20 frames to choose from. Somewhere in there is the shot.
This is especially clutch for:
- Dogs mid-jump or mid-fetch
- Puppies who simply cannot stay still
- That hilarious running-with-floppy-ears moment you’ll never get tired of
To pick the best frame, open the burst in your Photos app, tap “Select,” and scroll through. iPhones even suggest the sharpest shot automatically.
One tip: burst mode works best in good lighting. In dim conditions, even burst mode will struggle with motion blur, so always try to have decent light before going action-shot crazy.
Best iPhone Camera Settings for Dog Photography
Most people just open the camera app and tap the shutter. There’s nothing wrong with that, but tweaking a few settings makes a surprisingly big difference.
Here’s what to use:
Portrait Mode. Switch to Portrait Mode for close-up shots where you want that beautiful blurry background effect. It works best when your dog is about 2 to 8 feet away. Great for calm moments like your dog lounging in evening light.
Exposure Adjustment. After tapping to focus, slide the sun icon up or down to brighten or darken the shot manually. Dark fur especially needs a small exposure bump to show detail instead of turning into a shadowy blob.
Turn Flash Off. Always. Flash startles dogs, blows out their features, and creates that creepy eye-glow effect. Turn it off and rely on natural light instead. Your photos will immediately look better.
HDR (Smart HDR). Leave Smart HDR on. It automatically blends multiple exposures so highlights and shadows both look balanced. Especially useful on bright days outdoors.
Turn on Gridlines. Go to Settings > Camera and enable the grid. It helps you frame shots using the rule of thirds, which we’ll cover shortly. It’s a small thing that trains your eye over time.
Live Photo. Keep Live Photo on during action sessions. Sometimes the frames just before or after the actual shot are the magic ones.
Lighting Secrets: Make Your Dog Glow Naturally
What’s the best lighting for dog photography at home or outside?
Lighting is honestly the single biggest factor between a mediocre photo and a stunning one. The good news? The best light is completely free.
Indoors: Use Window Light Find the biggest window in your home and set up near it. Position your dog so the light falls on their face, not behind them. That soft, diffused daylight creates flattering shadows and brings out fur texture beautifully.
Avoid overhead ceiling lights. They cast harsh shadows under the eyes and chin and make photos look flat and unflattering.
Outdoors: Shoot During Golden Hour The hour after sunrise and the hour before sunset are pure magic for photography. The light is warm, soft, and low-angled, wrapping around your dog like a natural filter.
Midday sun is the enemy. It creates harsh shadows, squinting eyes, and washed-out color. If you have to shoot midday, find open shade under a tree instead.
Always Position Your Dog Facing the Light Whether indoors or outside, have the light source in front of your dog, not behind them. Backlit dogs turn into silhouettes fast unless you’re going for that look intentionally.
Good light covers a multitude of photography sins. Bad light ruins even a perfectly timed shot.
How to Make Your Dog Pose Naturally
Short answer: you kind of don’t force it, and that’s the whole point.
The best dog photos rarely come from rigid posing. They come from guided spontaneity, which sounds fancy but just means you create the right conditions and let your dog do their thing.
Use Sounds to Get Attention Whistle softly, make a kissy noise, crinkle a treat bag, or say a word they don’t hear often. That head tilt? Pure gold. Be ready to shoot the second it happens because it lasts about two seconds.
Use Treats Strategically Hold a treat just above your lens to get your dog looking directly at the camera. Don’t keep repeating it too many times or they’ll start jumping at your phone instead.
Capture Candid Moments Some of the best shots happen when your dog doesn’t even know you’re photographing them. Catch them mid-yawn, watching birds out the window, or curled up in a patch of sunlight. Real moments feel more alive than posed ones.
Reward Every Good Moment Keep the energy positive. If your dog sits nicely or looks at the camera, immediately reward them. They’ll start associating photo time with good things, making future sessions way easier.
Patience is genuinely the most important tool in your kit here.
How to Capture Sharp Photos of Moving Dogs
How do you take clear pictures of a hyper dog with an iPhone?
If your dog treats stillness as a personal insult, welcome to the club.
Here’s how to win anyway:
- Lead with burst mode. As covered earlier, hold the shutter to fire multiple frames rapidly. The more options you have, the better your chances of grabbing one sharp shot.
- Shoot in bright light. Motion blur is mostly a low-light problem. Take your hyper pup outside on a bright day and half your blur problems disappear instantly.
- Anticipate the pause. Even the zoomiest dogs pause briefly between movements. Watch your dog’s patterns and be ready to shoot at the natural pause point, like when they change direction or land from a jump.
- Keep your elbows tucked. A steadier body means a steadier camera. Tuck your elbows in against your sides when shooting to minimize phone shake.
- Try Action Mode on newer iPhones. iPhone 14 and later have a dedicated Action Mode that stabilizes footage and photos during fast movement. Worth experimenting with.
Accept that you’ll delete a lot of shots. That’s completely normal, even for professional pet photographers.
Composition Tips for Stunning Dog Photos
How do you make a dog photo actually look visually interesting?
Good composition is what separates a snapshot from a photo you want to frame.
Rule of Thirds. With your gridlines on, place your dog’s eyes along the top horizontal line rather than dead center. Off-center subjects feel more dynamic and natural to the human eye.
Clean the Background. Before shooting, take five seconds to look at what’s behind your dog. Move a trash can, kick away a stray shoe, reposition slightly to swap a busy background for a plain wall or open sky. Small adjustments make massive differences.
Use Natural Frames. Doorways, tree branches, park benches, and tall grass all create natural frames around your dog that add depth and visual interest to a photo.
Leave Space for Movement. If your dog is looking or running in one direction, leave empty space in the frame ahead of them. It gives the photo visual breathing room and feels intentional rather than cramped.
Great composition often just means slowing down for ten seconds before hitting the shutter.
Editing Your Dog Photos on iPhone
Do you need fancy editing apps to make dog photos look great?
Not at all. Your iPhone’s built-in Photos app is genuinely powerful and completely underused.
Start with the Basics. After shooting, open the photo, tap Edit, and start here:
- Exposure: Brighten slightly if the photo looks dark
- Brilliance: Great all-around adjustment that lifts shadows and adds clarity
- Contrast: A small bump adds depth and punch
- Warmth: Slide slightly warm for a cozy, natural feel
- Sharpness and Definition: Bring these up a touch to make fur texture pop
Don’t Overdo It. Over-edited photos look fake fast. The goal is to enhance what’s already there, not create a completely different image. If someone looks at the photo and immediately thinks “wow that’s filtered,” you’ve gone too far.
Optional: Try Lightroom Mobile. If you want more control, Adobe Lightroom Mobile has a free version that’s excellent. Their pet presets are a solid starting point.
Editing should take 2 to 3 minutes per photo max. Keep it simple.
Common Mistakes to Avoid
What do most people get wrong when photographing their dogs?
Avoiding these mistakes will instantly improve your results:
- Using flash. It startles your dog and ruins the photo. Just don’t.
- Shooting from above. Standing over your dog creates unflattering, disconnected photos. Get low.
- Ignoring the background. A cluttered background steals attention from your dog. Clean it up before shooting.
- Being impatient. Frustration transfers to your dog and they become even less cooperative. Keep the vibe light and fun.
- Over-relying on Portrait Mode. Portrait Mode is great but struggles with fast movement. Use it for calm moments only.
- Not cleaning your lens. Your phone lens lives in your pocket and gets smudged constantly. A quick wipe on your shirt before shooting costs nothing and makes a real difference.
Fix these six things and your photos will noticeably improve overnight.
Conclusion
Ready to take your dog photography to the next level?
You’ve got everything you need right in your pocket. A powerful camera, the right techniques, and a four-legged model who’s available basically 24/7.
Start small. Pick one tip from this guide, maybe the eye-level trick or window lighting, and try it on your next walk or lazy afternoon at home. You don’t need perfect conditions. You just need to start.
The best camera really is the one you use most. And the iPhone you already own? It’s more than enough to capture photos worth printing, sharing, and keeping forever.
If your pup needs a little freshening up before their photo debut, check out our guide on best mobile dog groomers in Austin to get them looking their absolute best.
Now go bother your dog with your camera. They secretly love the attention.
Frequently Asked Questions
1. Can I take professional dog photos with just an iPhone?
Yes. Modern iPhones have advanced cameras that capture high-quality, professional-looking dog photos with the right techniques. You genuinely don’t need anything else.
2. What is the best iPhone mode for dog photography?
Portrait Mode works great for still, close-up shots. Burst Mode is your go-to for action and playful moments. Use both depending on the situation.
3. How do I take clear photos of a hyper dog?
Use Burst Mode, shoot in bright natural light, and learn to anticipate the brief pause moments between your dog’s movements. Patience helps too.
4. What lighting is best for dog photography at home?
Natural light from a large window is ideal. Position your dog facing the window for soft, flattering light that brings out fur detail beautifully.
5. How can I make my dog look at the camera?
Hold a treat just above your lens, make an unusual sound, or crinkle a treat bag. Be ready to shoot the instant they look because the moment is fleeting.
6. Why are my dog photos blurry on iPhone?
Blur usually comes from motion, low light, or tapping the wrong focus point. Use Burst Mode, shoot in brighter conditions, and always tap directly on your dog’s eye to lock focus.
